Compose you, be pleased me, maintain paper documents which maintain lengthy since been scanned and processed, info or song cassettes that that that possibilities are you’ll be pleased to hear to on your cell phone, and movie prints which will seemingly be planned for a digital declare book?
Then you would possibly well be pleased the two-step instructions listed right here, with which you would possibly well furthermore convert analog media to digital after which task them additional.
Scan documents and maintain textual utter material diagnosed
Crucial insurance coverage papers, contracts, invoices, or merely the page-lengthy letter from your popular aunt — there are many paper documents that you just if truth be told want to scan in declare to win them.
If it’s even a textual utter material that you just if truth be told want to search and edit, that possibilities are you’ll furthermore bustle OCR machine over it after scanning, which recognizes the textual utter material in command that that that possibilities are you’ll furthermore search it and, if significant, edit it with an standard note processor.
Step 1: Scan documents
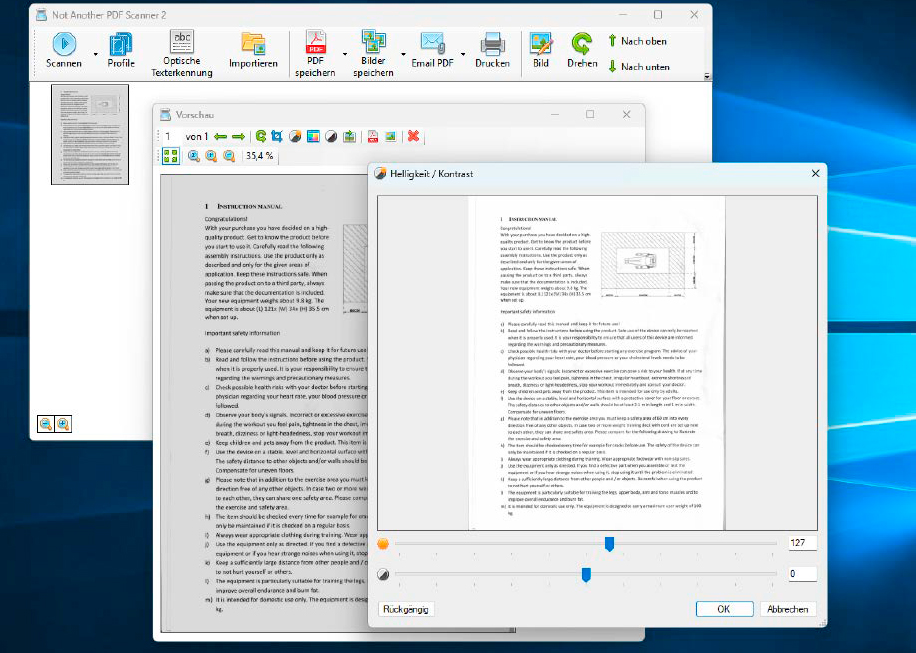
With the freeware No longer One more PDF Scanner 2 (Naps 2), that possibilities are you’ll furthermore maintain quite a lot of alternatives for editing and saving the scan after scanning a doc. The machine is furthermore very straightforward to use.
IDG
To digitize a paper doc, you desire a scanner and the corresponding machine. The scanner can both be a aggregate printer with a scan feature or a standalone machine that would possibly well absolute most practical scan.
In declare so that you just can scan quite a lot of documents, that possibilities are you’ll furthermore furthermore opt for a trusty doc scanner from Ricoh’s Scansnap family, to illustrate. Reckoning on the model, these gadgets cost from round $350, are designed for high throughput, and are furthermore able to duplex scanning.
If, on the opposite hand, you don’t maintain the distance for a aggregate printer and absolute most practical want to scan particular particular person pages of textual utter material normally, a cell scanner such because the Brother DS-640 for round $100 is correct.
However, a scanner on my own does now not keep a scan. You furthermore at all times need scanning machine or the scanner driver. Right here is in total supplied with the machine and offers extra or much less settings with which you would possibly well furthermore have an effect on the scan result, including the decision, the output directory, and alternatives for duplex scanning, if a machine supports this.
If the motive force alternatives should now not ample, that possibilities are you’ll furthermore furthermore use third-celebration machine. We counsel the originate source program No longer One more PDF Scanner 2, or Naps 2 for brief.
The machine works with the gadgets of all main manufacturers and offers an OCR (Optical Personality Recognition) feature as a certain feature — i.e. it might truly acknowledge scanned textual utter material. However extra on this in step 2.
To make use of Naps 2, first manufacture a profile to your scanner or aggregate printer. To attain this, click on on Profiles > Novel > Pick out machine after which on the product title, then click on twice on “OK” and “Done.”
Scan the desired doc and double-click on on the preview. You now maintain the option of rotating the scan, cropping it, adjusting the brightness, distinction, hue, and coloration saturation the utilization of the slider, converting it to unlit and white, and sharpening it.
As soon as the corrections are entire, set aside the scan as a PDF or declare, whereby BMP, GIF, JPG, PNG, TIF, EMF, and Exif are on hand for preference and you would possibly well furthermore furthermore keep additional settings.
Step 2: Behold textual utter material
As already talked about, Naps 2 offers you the option of working textual utter material recognition on the scanned doc after each scan. In the “Optical textual utter material recognition” menu item, say out the language of the doc, the OCR mode (At the moment, Simplest, or Legacy), whether or now not the diagnosed textual utter material is searchable, and whether or now not the OCR wants to be activated mechanically after each scan.
German and English are already pre-assign in for the doc language, other languages would possibly well furthermore furthermore be added free of cost by the utilization of a download hyperlink.
Consideration: Naps 2 cannot output and set aside the scanned textual utter material as a textual utter material file! In declare so that you just can edit the textual utter material, set aside the scanned doc as a PDF, originate it in a PDF viewer, after which reproduction the textual utter material into a note processor the utilization of “Pick out all” and “Paste.”
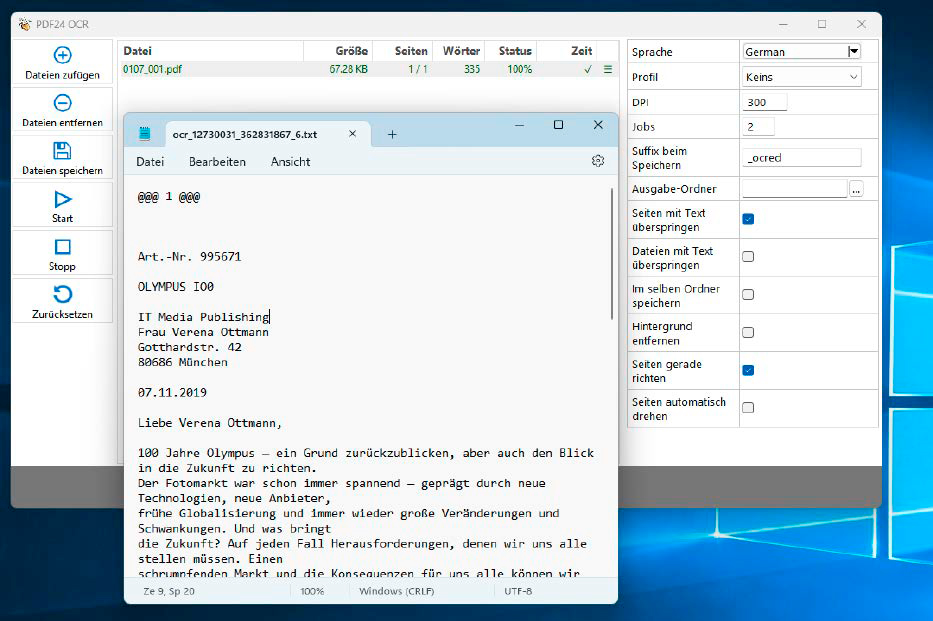
The free PDF24 Creator has an built-in OCR feature that reads textual utter material in PDF files so they would well furthermore furthermore be searched later. It furthermore outputs the texts as a TXT file for editing if required.
IDG
Alternatively, that possibilities are you’ll furthermore furthermore use PDF24 Creator and make contact with up the built-in textual utter material recognition by the utilization of the “Initiate PDF24 OCR” button.
Pick out the desired PDF by the utilization of “Add files” and open the OCR with “Originate.” As soon as entire, click on on the three horizontal lines subsequent to the PDF and on “Worth diagnosed textual utter material.” A TXT file opens with the diagnosed textual utter material, which you would possibly well furthermore adapt and set aside as required.
Digitize and optimize photos
In the occasion you proceed to maintain paper prints of photos sorted in albums or mendacity round loose, that possibilities are you’ll furthermore declare them conveniently, nonetheless furthermore laboriously alongside with your smartphone.
In the occasion you absolute most practical want to digitize slides or negatives, you would possibly well procure what you is seemingly to be purchasing for in Kodak’s Slither-N-Scan vary. The gadgets are on hand with or without a price and encourage movie formats of 135, 110, and 126 millimeters.
Finally, photos can furthermore be scanned the utilization of the scan feature of a passe aggregate machine. There are furthermore scanning applications with built-in declare processing which will seemingly be critically correct for scanning paper prints.
Step 1: Scan photos
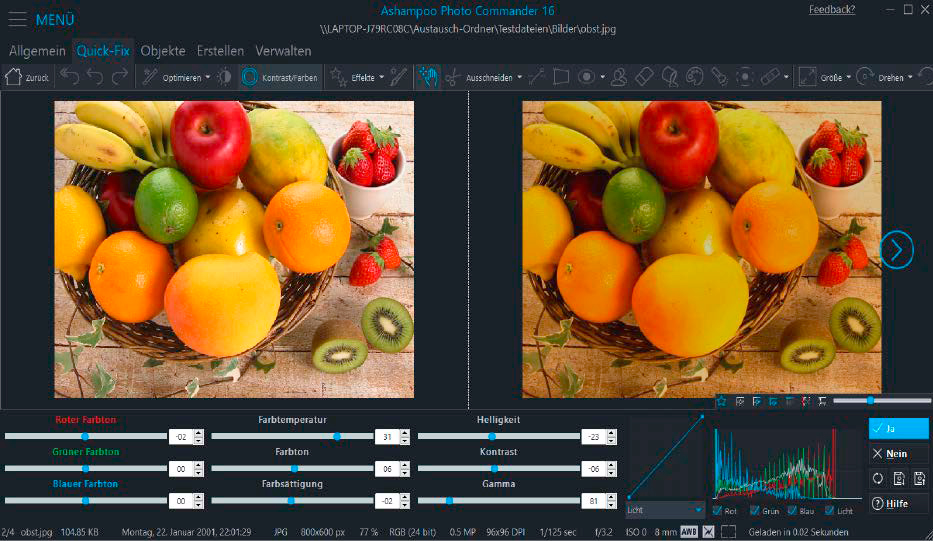
Portray Commander 16 from Ashampoo capacity that you just can scan paper prints alongside with a scanner and furthermore has frequent editing instruments on board.
IDG
Ashampoo Portray Commander 16 is the appropriate machine for scanning and editing photos.
After set up, click on on the three horizontal lines after which beneath File > Scan/Import > Scan declare. Pick out your scanner or the mix machine, specify the output format — right here that possibilities are you’ll furthermore desire from PNG, JPG, PDF, and Multipage PDF — and the folder in which the pictures are to be saved. Click on “Scan” to open scanning.
Step 2: Optimize pictures
In the occasion you would possibly well be pleased to edit your scanned pictures with Portray Commander 16, you would possibly well procure various alternatives in the “Edit” menu, about a of which you would possibly well furthermore furthermore access by the utilization of the navigation bar:
- With the “Like a flash Fix Tools” that possibilities are you’ll furthermore optimize distinction, colors, and white balance, decide declare noise in three stages and straighten an declare.
- A at ease heart of attention, red-watch remover, clone trace, and eraser are furthermore on hand.
- Under “Edit objects” that possibilities are you’ll furthermore add textual utter material and shapes, whereas “Alter” adjusts the image size and the canvas.
- Final nonetheless now not least, that possibilities are you’ll furthermore maintain the option of influencing the coloration depth, making use of blurring, and editing an declare in regards to the coloration channels.
By the capacity: You might well be ready to customize the appearance of the program beneath “Configuration” and “All settings.” For instance, unchecking “Contemporary app menu” beneath “Traditional” makes the interface worthy clearer and simpler to use.
Digitize info and space up song
Tune enthusiasts nonetheless rave in regards to the atmospheric crackling of a file in comparison with the sterile sound of a CD. In declare so that you just can ride the crackling sound on your cell machine, it is fundamental to nonetheless convert your info to digital.
Step 1: Digitize vinyl info
There are various ways to join a file player to your PC. If the machine has a USB port, merely join it to the computer as traditional the utilization of a USB cable.
However, if the file player has a various audio output, comparable to line-out by the utilization of cinch, jack, or similar, the PC should nonetheless maintain a correct line-in connection.
You might well furthermore need the appropriate audio cable (comparable to RCA to RCA, RCA to jack, or jack to jack) to join the two gadgets together. Make certain that you just use the appropriate connector variety, i.e. TS for mono or TRS for stereo indicators.
In case your PC does now not maintain a line-in socket, that possibilities are you’ll furthermore furthermore use the microphone enter, or — especially advised for notebooks that attain now not maintain audio inputs — that possibilities are you’ll furthermore assemble a USB adapter with microphone and headphone connection, which is on hand from Amazon from $9. They in total furthermore provide better sound quality than the built-in onboard sound chips on the motherboard.
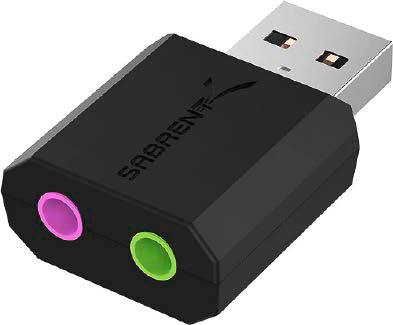
Especially with notebooks that attain now not maintain audio inputs, that possibilities are you’ll furthermore retrofit audio sockets for miniature money with a USB adapter. The adapters are if truth be told supposed for connecting headsets.
IDG
Besides to to the hardware connection, you would possibly well furthermore need recording machine to digitize your info. The freeware Audacity is correct for this.
You might well possibly furthermore want to first configure it after set up: Under Edit > Settings > Devices in the “Playback” and “Recording” sections, say out the sound card or the connection on your PC because the “System.” Alternatively, that possibilities are you’ll furthermore keep the preference by the utilization of the descend-down menus in the first window.
You might well be ready to furthermore specify beneath Edit > Settings > Devices in “Recording” beneath “Channels” whether or now not it is fundamental to keep the recording in mono or stereo.
If significant, keep additional settings beneath “Quality” and “Directories” as soon as you happen to would be pleased to alternate the default storage folders for saving, opening, importing, and exporting.
If every thing is configured accurately, open playback of the file, and concurrently open digitization by pressing the red button.
Consideration: If the sound note in Audacity is slit off on the tip and backside, it is miles significant to alter the quantity in the program.
To set aside the file, say out the desired format by the utilization of File > Export, whereby the significant library for MP3 is already assign in. You might well be ready to download extra libraries free of cost by the utilization of the menu item of the same title.
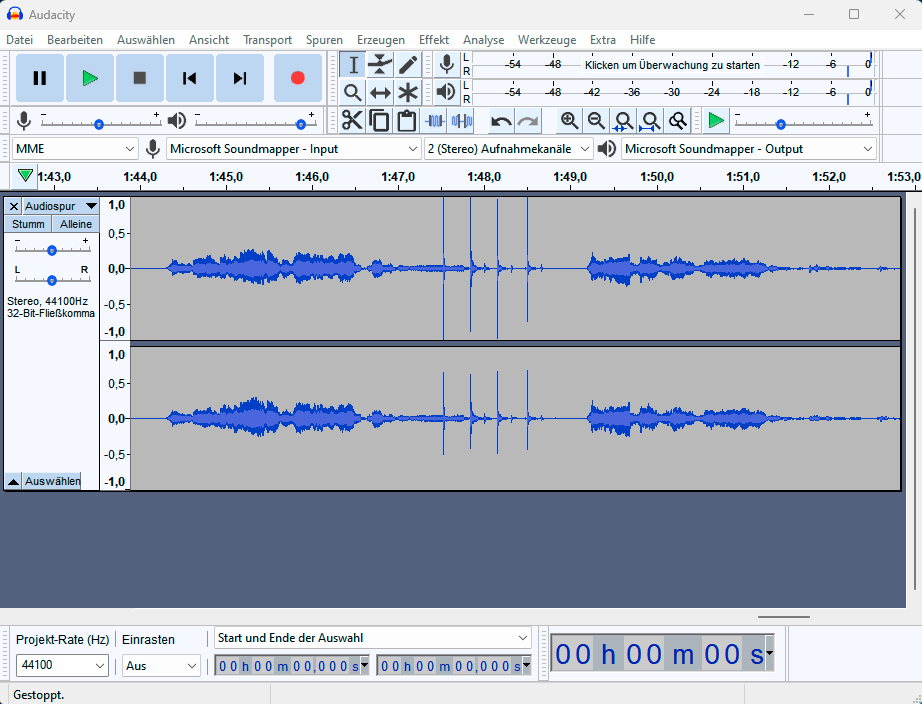
With the freeware Audacity that possibilities are you’ll furthermore digitize info, cassettes, and other analog media, supplied that possibilities are you’ll furthermore maintain a playback machine and the significant connections on your PC. You might well be ready to encourage watch over the stage by the utilization of the quantity in the program.
IDG
By the capacity: Tune cassettes can furthermore be digitized in the same capacity. You wish a cassette player with audio or headphone output and the appropriate cable to the PC. Audacity then serves as recording machine again.
Step 2: Arrange and play tracks
In the occasion that possibilities are you’ll furthermore maintain your info in MP3 format on your noteworthy power, you now want to transfer the tips to your cell machine. You might well be ready to attain this with Audials One 2024 Special Model, to illustrate.
This procedure is essentially designed to file song, podcasts, and free videos from the web. However, it might truly furthermore be old to administer and transfer song.
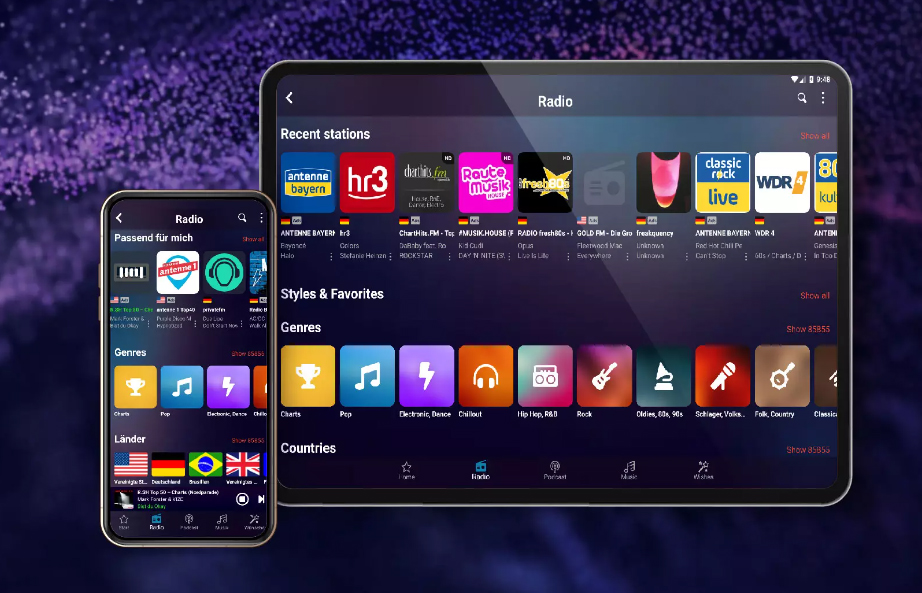
The free Audials Play app offers you access to the song on your PC and you would possibly well furthermore furthermore download it to your cell phone. The utter material of your PC then seems as a separate tab in the app.
IDG
After set up, click on on the sheet song image in the first ogle. You might well land in the “My song” dwelling, where that possibilities are you’ll furthermore call up the “PC” storage fame the utilization of the arrow to the excellent of the lettering. Click on the entry, then on the three dots and “Choices.” In the “Additional folders to price” portion, click on on “Add, song files,” and navigate to the folders with the digitized info. Verify with “Pick out folder” and “OK.”
The folders including the audio tracks now appear in the first ogle of Audials One 2024 SE and would possibly well furthermore be edited the utilization of the pencil icon.
To transfer your song to your cell machine, you would possibly well need the free Audials Play Android app. Log in with the same Audials tale to which you would possibly well furthermore maintain registered Audials One 2024 SE.
Then tap on “Tune” and switch to the tab that bears the title of your PC. You might well procure your song there and would possibly well download it the utilization of the three dots and “Copy to phone.”
This text used to be translated from German to English and at the delivery seemed on pcwelt.de.